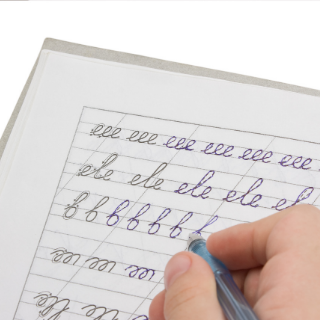
This language lesson is designed for 6 to 12-year-old children to guide them on how to write English alphabets x and z in cursive.
What is the Purpose of Cursive Writing?
Cursive writing refers to styles of writing in which characters are joined in a flowing manner, with the goal of making writing faster, as compared to capital writing.
Benefits of Cursive Writing
- It helps to improve handwriting and speed of writing.
- It helps the child to develop and practice hand-eye coordination.
- It helps in strengthening the finger muscles and developing fine motor skills.
- It helps in developing sensory skills as it teaches children the position of the pencil, strokes to apply, and where to apply pressure while writing.
- It enhances memory and concentration.
Writing a lowercase English alphabet in cursive is done by forming a stroke. Therefore, we learn to write cursive letters according to the stroke family.
How to Write the Letters x and z in Cursive?
This video guides us through writing lowercase alphabets (letters) in cursive. Lowercase letters are also known as close letters. Writing the lowercase letters starts by leaving a small gap.
The best way to begin writing letters x and z in cursive is to trace them on sandpaper and then write them on paper. In this video lesson, we will learn to write cursive x and cursive z belonging to the bump family. Bump letters are lowercase cursive letters that start from the baseline with a low curve on a 45-degree angle that peaks with a curved “bump” at the middle line. Letters x and z are introduced as Xavier and Zelma.
- To write cursive x, Begin the stroke above the bottom line. Take your stroke upwards to the midline, make a curve, and then take your stroke back to the right and down to the bottom line. Don’t forget to leave a trail out to the right side to end the letter or connect to your next letter. Then, begin this stroke at the midline on the left side. Take your stroke to the right, crossing your initial first line in the middle. Finally, your stroke should meet the bottom line on the left side.
- To write cursive z, Begin the stroke below the midline, then make a small “2” like shape, but without the tail on the end of the two. When the stroke meets the bottom line, make a quick loop. Then take your stroke below the bottom line, make a loop, and finish your stroke back above the bottom line, leaving a tail out to the right side to end the letter or to connect to your next letter.
The cursive writing lesson helps in improving the child’s reading and writing ability.
Watch the video to know more about how to write cursive letters x and cursive z using hump stroke. Repeat this activity by asking the child to practice x and z alphabets in cursive, as shown in the video.
Related Video Resources:
To watch more language video resources, click here.
Video Created by: Jodi Qualters
Tags
- cursive writing
- elementary level
- english language
- writing skills


