

This language lesson is designed for 6 to 12-year-old children to guide them on how to write the English alphabets g and q in cursive.
Handwriting practice helps in strengthening the finger muscles and developing fine motor skills. It also helps the child to develop and practice hand-eye coordination.
In our blog, “Importance of learning cursive writing for children in the age of tablets” we have already discussed cursive writing, its benefits, and how it is introduced in the Montessori curriculum. In this video lesson, we will learn about how the letters g and q are introduced to the child in Montessori.
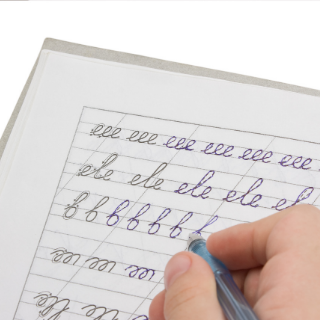
Writing a lowercase English alphabet in cursive is done by forming a loop. Therefore, we learn to write cursive letters according to the loop family.
Rules for Cursive Writing
Before you begin to write in cursive, it’s a good idea to first make sure you have set some rules to attain the best of writing. Here is a quick overview of them.
- The height of all similar letters should remain the same.
- Form the strokes and patterns correctly.
- Downward strokes of all the letters should be parallel
- Adhere to the line and the zones of each letter.
- Spacing should be proper between the strokes, loops, connectors, and further the alphabet.
- Sit in a good posture with the back straight
- Focus correctly on the writing strokes.
- Use softer pencils or felt-tip pens.
- Master the 3-finger pencil/pen grip
How to Write Letter g And Letter q in Cursive?
The beginning of writing g and q in cursive can be made simpler for children by tracing them using sandpaper letters and then writing them on paper. The above video lesson is a demonstration of writing cursive g and q which are introduced in the wave letter family. The letter g and q are lower or down zone letters which mean it lies between the headline and the bottom line.
- To write cursive g: Begin with the baseline. Make an under-curve towards the top line. Now come back with a down curve till the baseline. Now move again to the headline. Falls down to the bottom line, and makes a loop back around the left making a slant stroke back to the baseline. Take it a little above the baseline. After meeting the baseline, leave the stroke with a connector towards the right side to end the letter or to join other cursive letters.
- To write cursive q: Begin with the baseline. Make an under-curve towards the headline. Now come back with a down curve till the baseline. Now move again to the top line. Falls down to the bottom line with a slant stroke and make go back up again to the baseline from the right side, making an angle curve. Take it a little above the baseline. Leave the stroke with a connector to end the letter or to join other cursive letters.
This cursive g and cursive q writing lesson help in improving the child’s reading and writing ability.
Watch the video to learn more about how to write cursive letters g and cursive q using loop stroke. Repeat this activity by asking the child to practice g and q alphabets in cursive, as shown in the video.
Related Video Resources:
For more language resources, click here.
Video Created by: Jodi Qualters (Montessori in the Park, Goodyear, Arizona)
Elementary | Language | Cursive g and q (English)
FAQs
- How do you write a lowercase cursive “g”?
To write a lowercase cursive “g,” start at the top line and make a small loop to the left, then bring the line down to the bottom line and curl it back up to the middle line. Finally, make a small hook to the right at the bottom of the line.
- How do you write a lowercase cursive “q”?
To write a lowercase cursive “q,” start at the top line and make a small loop to the right, then bring the line down to the bottom line and curve it back up to the middle line. Finally, make a small hook to the right at the bottom of the line.
Tags
- cursive writing
- Elementary
- English
- Language