

This practical life video lesson is designed for 1-3-year-old children. It helps them learn how to transfer water from one glass to another with the help of the Montessori water transfer activity.
Children love playing with water. Transferring water from one container to another helps them pour water for themselves as they perform their daily chores independently and confidently.
What is the Montessori Water Transfer Activity?
Montessori water transfer (also known as pouring wet) is a practical life activity introduced in the early childhood lessons of a Montessori classroom. It helps the child master the hand grip and prepares their hand for writing. Children enjoy transferring work and often love to do this exercise, as it involves fun, creativity, and sounds.
This activity is can be introduced in two ways:
- Pouring Dry: transferring dry material such as beans, rice, lentils, cotton balls, or any other dry object from one container to another.
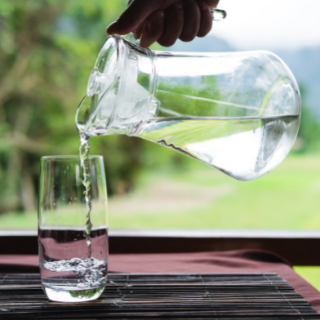
- Pouring Wet: transferring liquids such as water, milk, or any other liquid from one glass to another using a glass or a pitcher.
Benefits of Montessori Water Transfer Activity
- It helps a child learn how to hold a glass steadily and transfer the water from one glass to another without spilling.
- It helps a child build a stronger hand grip to hold the glass in one hand.
- It helps a child learn the concept of measurement and estimation.
- It helps to develop OCCI (Order, Concentration, Coordination, and Independence).
- It helps to promote visual discrimination.
- It helps in building control of body movements and fine motor skills.
- It strengthens the finger muscles and allows them to practice hand-eye coordination and handwriting.
Points of Interest for the Montessori Water Transfer Activity
- Is the child capable of holding the glass properly?
- Is the child able to scoop water with a manageable amount?
- What is the difference between the weight of an empty glass and a filled glass?
- Is the child able to balance the water without spilling in a glass while transferring?
- What is the visual difference between the filled and empty glass?
- What sound does the water make as it falls into the empty glass (auditory feedback)?
Control of Error of the Water Transfer Activity
- Every time a glass will be empty and one filled once the activity is completed
- There is no spilled water on the tray.
In this video, a child will learn about transferring water from one container to another.
Materials Required for a Montessori Water Transferring Activity
- A tray
- 2 same-sized glasses or cups
- 1 small sponge that could fit in a child’s hand
- Some liquid (water or colored water)
How to Present Montessori Water Transfer Activity to the Child?
- Invite the child to the table along with the water transfer activity tray from the shelf.
- Place the glasses on the mat. Keep the full on the left and the empty glass on the right.
- Now, tell the child that today, we will learn how to transfer water from one glass to another.
- Now pick the filled glass and hold it between your dominant hand, making a C, as shown in the video.
- Give the child time to master the right holding position of the glass.
- Once the child is ready, ask the child to transfer the water slowly to the other glass.
- Repeat the activity until the first glass becomes empty, and the water is transferred to the empty glass.
- Now, ask the child to transfer the water back to the original glass in the same way.
- Wipe off the spilled water using the sponge, if any.
- Ask the child to try the transferring water activity independently.
Tip#1: Add a food dye to the water. It makes the activity appealing and also helps them identify and visualize the amounts of water in the glass.
Tip#2: Use spouted glasses first as it is easy for the child to pour water.
Tip#3: Use glasses made of bamboo, steel, etc. instead of glass as it might hurt the child if gets broken.
Extension of the Montessori Water Transferring
- You can use liquids other than water such as juices, aerated drinks, oil, etc. with different viscosities as an extension of this activity.
- You can use a pitcher instead of glass to increase the complexity of holding and pouring.
Once done, allow them to return the materials back on the shelves at the designated place.
Let the child explore the activity of pouring liquid from one container to another and help them boost their confidence. Prepare them for more complex transfer activities as they grow.
Related Pouring and Transferring Video Lessons
For more practical life lessons, click here:
Video created by: Nithya Ramachandran
Tags
- English
- toddler education
- transfer activity