

This language lesson is a cursive handwriting lesson designed for 6 to 12-year-old children to guide them on how to write the English alphabets r and w in cursive.
In our blog, “Importance of learning cursive writing for children in the age of tablets” we have already discussed cursive writing, its benefits and how it is introduced in the Montessori curriculum. In this video lesson, we will learn how to write lowercase letters r and w in cursive.
Cursive Letters and Sequence
Cursive letters are written using many strokes and curves. Unlike the traditional way of teaching letters, cursive writing is taught in distinct order. With incremental movements, the child can write cursive letters more easily. Furthermore, it strengthens finger muscles and develops fine motor skills and hand-eye coordination.
Cursive letters are introduced in the following sequence:
Sequence #1: Letter c, a, o, d, g, q
Sequence #2: Letter i, u, w, t, r, s, j, p
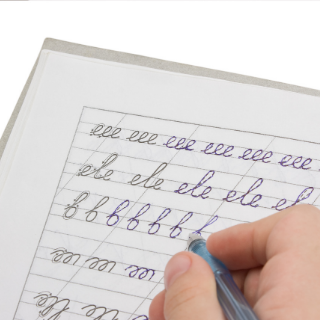
Sequence #3: e, l, b, f, h, k
Sequence #4: n, m, v, y, x, z
The letter order is based on a combination of research-based strategies that consider movement patterns and the way letters connect to form words.
In Montessori, cursive letter writing is further introduced using loop families to help children learn the direction in which the curves are formed.
How to Write the Letters r and w in Cursive?
In this video lesson, we will learn to write cursive r and cursive w. These letters belong to the up-and-down stroke family as it likes to make backflips. In this video, the letters r and w are introduced as Robby and Wanda to help the child understand better.
Letters ‘r’ and ‘w’ are mid-zone letters which means they lie between the baseline and the headline.
- To write cursive r: The first stroke starts with an under the curve from the baseline and goes till the midline. Now make a small loop from the left followed by making a small reaching till the midline. From here make a slight curve that reaches the baseline and at the end leave the curve in the middle of the midline and baseline, finishing letter r at the connector.
- To write cursive w: The first stroke starts from the baseline with a slight curve that ends at the midline. Now come to the baseline again whilst making a slight curve and go back to the midline doing the same. From here, go again for the baseline through a slight curve, make a half circle, and reach the midline. In the end, just make a slight curve at the midline, finishing the letter w in cursive.
This cursive writing r and w helps in improving the child’s reading and writing ability.
Watch the video to learn more about how to write cursive letters r and cursive w using up and down strokes. Repeat this activity by asking the child to practice them, as shown in the video.
Related Video Resources:
To watch more language video resources, click here.
Video Created by: Jodi Qualters (Montessori in the Park, Goodyear, Arizona)
Tags
- cursive writing
- Elementary
- English
- Language