

This video lesson is designed for 3-6-year-old children to teach them one of the practical life skills: hammering. It guides a child on how to use a hammer.
What is Hammering?
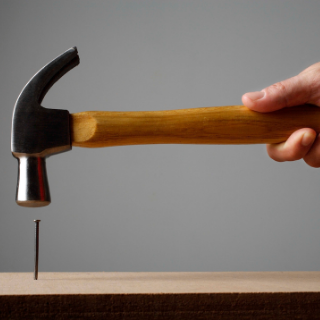
Hammering is a fun activity introduced in Montessori schools. Children love banging and ‘fixing’ the surrounding things. It helps the child to provide a deeper understanding of tools as preschoolers.
It involves using a small hammer with a rubber or foam head and tapping on different surfaces, such as wood blocks, metal bars, plastic keys, and so on. In this way, a child can learn how to control their movements and improve their hand-eye coordination.
What is the Purpose of Teaching Hammering a Nail to a Child?
Teaching hammering a nail has many benefits for children.
- It helps children develop the fine motor skills required to grasp nails and hammers.
- It develops the movements and hand-eye coordination needed for manipulating a hammer and nail.
- It teaches children about the importance of safety and following rules.
- It also helps to develop persistence as the child learns to master the skill.
- It helps a child to strengthen the hand to prepare for writing
- It teaches them independence, focus, visual discrimination, and concentration.
Material Required for Hammering Activity
- A working mat and tray
- A wooden block to hammer nails
- A hammer
- 3 small bowls, two containing the cutouts and one containing 4-5 nails
How to Introduce a Hammering Activity to the Child?
- Invite the child to carry the tray to the working table.
- Tell the child, “Today we are going to learn how to use a hammer and hammer a nail.”
- Introduce the design cards or cutouts to the child and allow them to choose one of them.
- After choosing, place the cutout on the wooden board.
- Pick one nail and place it in between your index finger and thumb, and place it in the middle of the cutout.
- While holding the hammer with your other hand, position the head of the hammer downwards.
- Start tapping the head of the nail carefully using the hammer. Now tell the child, “can you see the nail going inside the board?”
- After the nail takes in, remove your fingers and tap the nail in until it is completely inside the board.
Points of Interest:
- Does the child grasp the nail near its head?
- Does the child hold the hammer in the right direction?
- Do they apply optimal force in driving the nail?
- Does the child remove her fingers once the nail takes in?
Watch the video on hammering and encourage the child to use a hammer on different cutouts with safety.
Related Videos
Other Practical life activities related to hammering:
For more practical life lessons, click here.
Video created by: Strykun Olena
FAQs
- When should we introduce hammering a nail to a child?
You can teach hammering skills to a child of age 3-6 years. First, try with a toy hammer or child-size hammer keeping safety in mind. Once the skill is achieved and the child shows interest, move to the actual hammer.
- What do children learn from hammering?
Hammering activity helps a child develop various skills such as hand-eye coordination, strengthening muscles, preparing a hand for writing, etc.
- Is hammering a fine motor skill?
Yes, hammering helps in developing fine motor skills. It also teaches a child about safety and prepares children to do their daily household chores.
Tags
- montessori
- Montessori at home
- Practical Life
- primary
- primary level