

This Montessori practical life activity is designed for 1-3-year-old children to help them learn how to button and unbutton clothes using dressing frames: Montessori button frames.
The dressing frames in a Montessori curriculum are an important set of materials for learning self-care skills. Each frame helps a child achieve one dressing skill: opening or closing buttons, snaps, zippers, buckles, hooks, laces for tying shoes or laces, and safety pins.
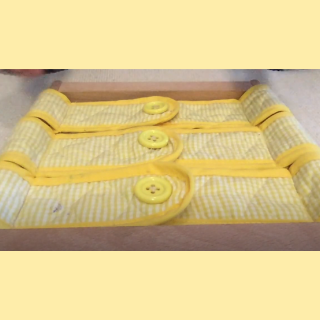
In this video lesson, we are going to learn about the Montessori button frame.
What is the Montessori Button Frame?
The Montessori button frame is an innovative, practical, and versatile educational tool to help children to dress independently. The dressing button frame is made of a hardwood frame with cloth flaps that fasten with buttons. It promotes independence in the child and prepares them to wear their own clothes.
Purpose of Button Frames
- Develops finger control and dexterity to manipulate buttons.
- Builds independence and concentration.
- Develops coordination and a sense of order.
- Helps a child master self-care activities, such as buttoning their own clothes.
- Enhances focus, fine motor skills, and hand-eye coordination.
Material Required for the Activity
Montessori Dressing frame: The button frame
Points of Interest:
- Does the child match the two sides of the cloth evenly
- Are they able to close the button with their respective holes?
- Do they tilt the button into the hole?
- Do they carry the button frame properly?
How to Present the Montessori Button Frame to the Child?
This activity is divided into two parts:
- unbuttoning and
- buttoning
Firstly, Invite the child to the table and tell them you have something to show. Tell the child that we will learn how to unbutton and button clothes using the button frame. Place the frame in such a manner that the buttonholes are on the right and start with the top button to work your way down. Now, follow the steps below.
Unbuttoning
- Using your right thumb and index finger, pinch the right side of the top button.
- Using your left thumb and index finger, pinch the material directly to the left side of the button.
- Gently pull the material to the left to create a hole.
- Tilt the button down to the left and start sliding the button through the buttonhole downwards.
- Un pinch your left fingers.
- Now, using your left thumb and index finger, pinch the left side of the button that is through the buttonhole. (In case of any doubt, watch the video).
- Rotate the material to the right to allow the button to come up completely through the buttonhole.
- Open both right and left flaps.
- The button of the button frame is open.
- Repeat the above steps for opening the rest of the buttons.
Buttoning
- Start with the top button
- Pinch the left side of the button between your left thumb and index finger.
- Pinch the material to the direct left of the buttonhole with your right thumb and index finger.
- Place your right thumb and index finger and pinch the material to the direct left.
- Start sliding the button halfway through the buttonhole in the downward direction.
- Release the material from the right hand.
- Now, using the right thumb and index finger, pinch the right side of the button that is coming through the hole.
- Unpinch the button from your left finger.
- Pinch the material from the left of the buttonhole.
- After this, pull the material to the left and the button to the right until it is fully through the hole.
- Firmly remove both fingers.
- Tell the child that this is how we button up the shirt.
Repeat this activity, as shown in the video, by asking the child to try buttoning button up their favorite clothing and instill a sense of independence and confidence in them.
Related Videos:
For more practical life lessons, click here.
Video created by: Hillary Dahl
Tags
- english language
- Practical Life
- toddler